Category Archives: Bike Stand

Bike and Turbine pretty solid now. Chain next…

As you’ll see in the vid below, I’ve overcome the two biggest, and inter-related, problems:

  1. the turbine occasionally tilting forward toward the bike and
  2. the bike stand sometimes being pulled upwards and back toward the turbine.

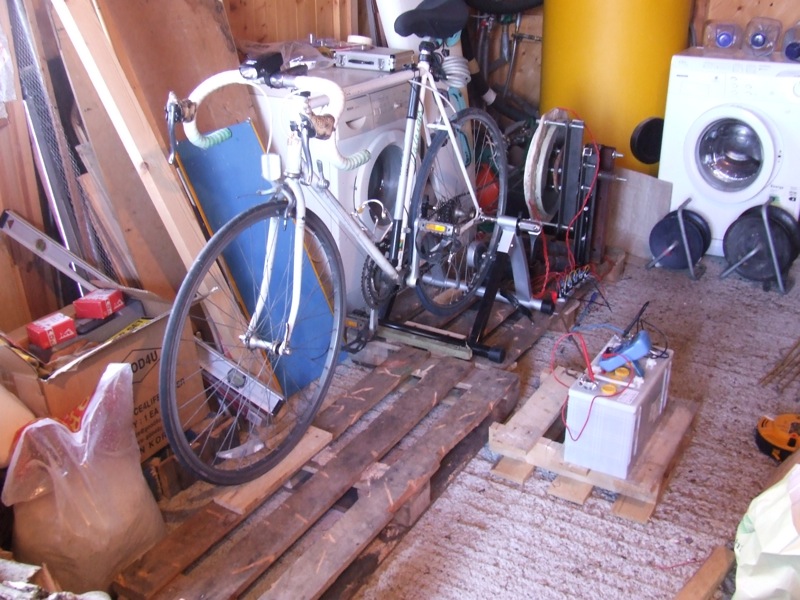
Building a frame and using clamps to help keep the bike stand in place, and bolting and bracing the turbine into that frame, seem to have resolved those two project-killing issues. So finally I can produce electricity in relative comfort!

(Note: motion sensitive people should watch with caution – hand-turning a pedal to get over 12.5 volts is hard work, so my camera arm wobbles a lot!).

Next challenge…

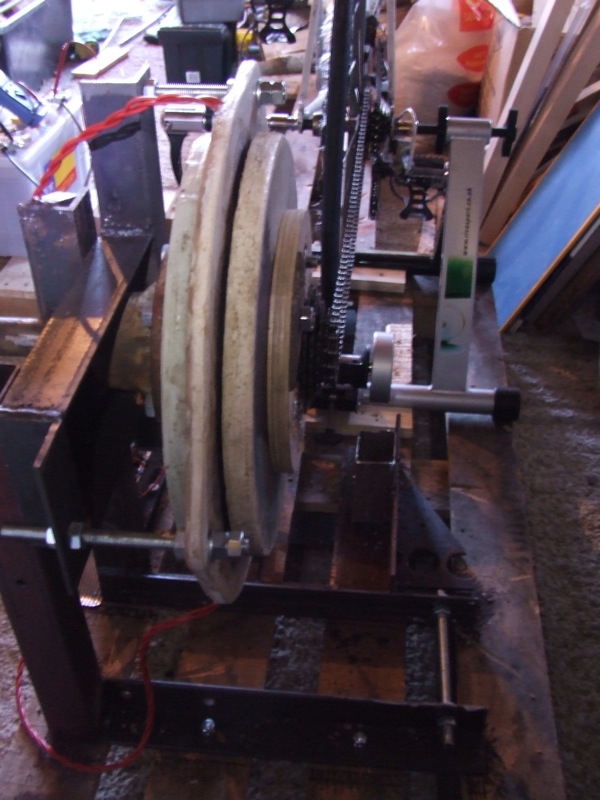
The last (hopefully!) major issue left is that of the chain skipping / jumping a cog or two when pedaling at 13.4 / 13.5 volts. Probably at least two contributing factors here.

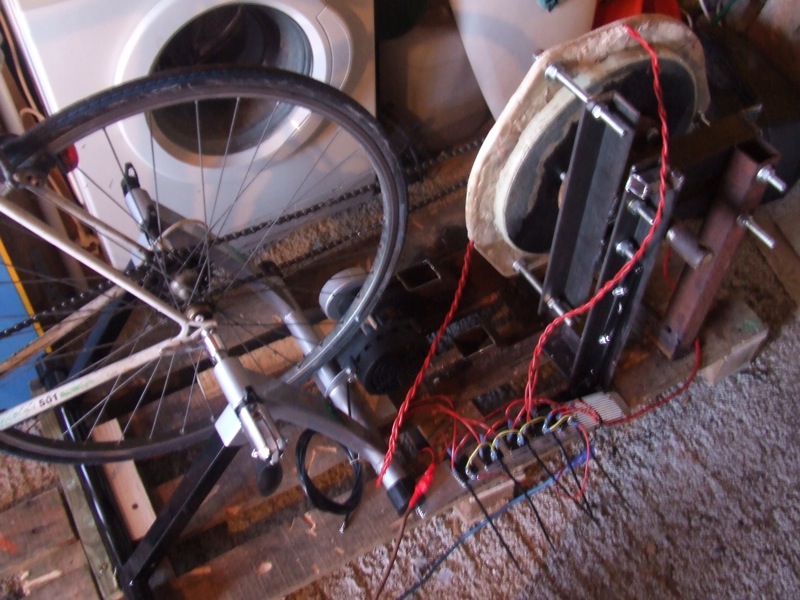
  1. the wobble in the face of the turbine means the cogs aren’t keeping to one plane while they rotate (although how to address that without stripping the whole thing down and shaving off some of the rotor’s steel face beats me!).
  2. I’ve not quite managed to get the face of the turbine parallel with the chain going to the bike. Fixing that might mean altering the new frame and bracing arrangement <sigh>.

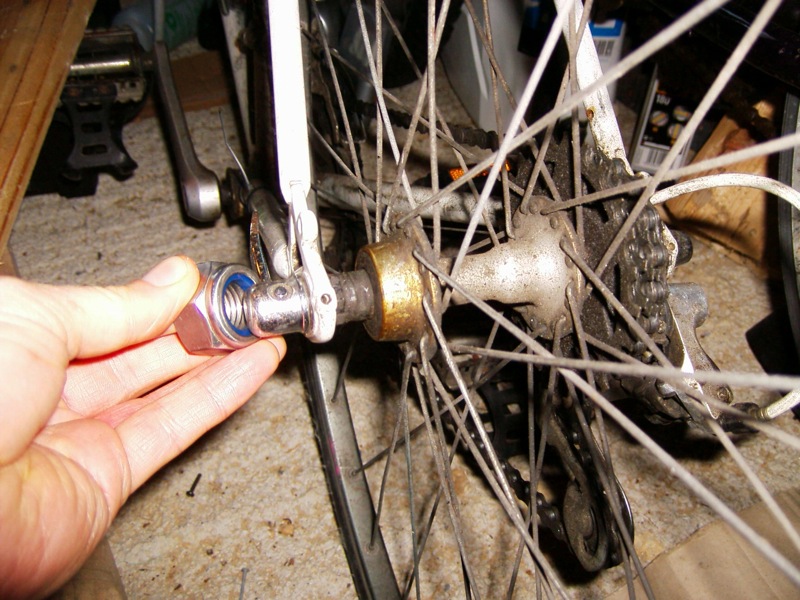
Of course in the video you might notice the chain appears very slack – and wonder why I don’t tighten it. The simple answer is that, with two links already taken out, tightening it any more will make it too rigid by far. Even moving it onto a bigger cog to take up some slack makes it far too tense. It wouldn’t last long given the forces at work here.

Of course the real answer is to start all over again and build a frame that allows for micro-adjustment of the distances and angles between bike and turbine… but affording the raw materials and time to do that would take a decent lotto win!

So I have to hope that I can resolve the chain problem another way.

I’m not HEAVY enough-!!

The inspiration can be slow sometimes…

… but my battery weighs a good 20-25kg and seems weighty enough to keep the back-end of the pallet from jumping so much.  Which is great in that the impact vibrations are practically nil on the alternator now.

But now there’s a new problem: I’M NOT HEAVY ENOUGH-!!

I thought my weight would be sufficient to hold the bike stand (& bike) down onto the pallet. That there would be no need to clamp the turbo trainer down onto the pallet.

But last night there were plenty of small lift-offs during a 23-min pedal. Which put me in mind of cycling along a bumpy Irish road (although the bumps in this instance were regular and predictable!).

Hard to tell while pedalling and looking over my shoulder, but the bike jumping up might be due to a combination of

  • the chain between bike and alternator being too taut so the bike now wants to move back toward the alternator (seeing as the alternator can’t move forward now, the bike moves backward toward it);
  • the pallet wood being too soft and so starts to bend up under the tension.

So it looks like a better pallet is definitely on for starters. A ‘euro’ pallet would do nicely. Hopefully that, combined with a less taut chain,* will resolve things. If not then I’ll have to invent a brace from alternator to bike stand.

More tweaking-fun ahead-!!

 * Should just be a matter of moving the chocks holding the turbo trainer in place. Simple job of unscrewing and moving them back slightly.

The racer! Finally-!!

A few hours measuring, looking and drawing suggested it might take two or more days to break apart the old and invent a new bike stand. Fine if one has the time; but I don’t.

So I ditched the M18 and M20 nuts idea, and moved toward a turbo trainer stand. Jumbletown and Freecycle couldn’t provide so I went shopping. But. given their weight & size, when postage was added to even the basic models I was as well off buying local.

So I did!

Was sorry I didn’t do this months ago-!! Because barely 24 hours after getting it to the house I’ve managed to fit my racer up and finally can pedal the turbike in comfort 8)


However, mounting the whole lot on this particular pallet is not ideal. Because the gyroscopic forces mean the alternator unit tends to jerk toward the bike with each pulse from my pedalling. Which might be okay if the back-end of the pallet didn’t also lift of the floor!

The jumping is tolerable at lower pedal rates. But when pedalling at 13.7 volts or more the distance from alternator hub to bike-axle shortens too much during some of the jumps. Which causes the connecting chain to jump and clunk badly. This means that not only might the chain fall off at any moment, but the alternator is receiving regular jolts and bangs… not good. Not good at all.

So I’m considering two things.

  1. Find a good euro pallet (they’re much heavier). Put some serious weight on the back-end of it.
  2. Brace the bike stand and alternator unit away from each other. Perhaps a metal bar between the two (but how to do this without damaging the turbo trainer…?)

The fun will continue it seems-!! 😀

P.S. The original mountain bike is on it’s way to Galway courtesy of a fellow Sligo Freecycle Member who had a friend in need there!

Racer should be an option soon!

Because I found that an M18 nut will fit snugly onto the right, and an M20 onto the left, of the quick release back axle. I will have to grind a slot a few mm deep into the M20 nut to allow for the quick release lever – and hopefully won’t damage the blue locking inser (because it seems to provide some cushioning and grip*).

But it’s not simply a matter of drilling holes in the existing stand for some threaded-bar clamps. Because the current stand is far too narrow. So I think I’ll replace it with a built-for-purpose stand and weld that to the generator’s frame.

Then I can freecycle that uncomfortable mountain bike out of my life! 🙂

* The blue locking insert may not provide enough cushioning against vibrational / noise while pedalling. If so, I’ll try inserting some rubber washers. Or might step up the nut sizes to allow for more rubber to be inserted (e.g. M20 & M22).

Ooops – the bike stand!

Finally, energy and some spare time combined nicely today and gave me a chance to bring my racer onto the scene. From which I learned that the frame for holding the bike will need considerable adjusting if it’s going to take my racer! 🙁

Firstly, the angle of the main strut of the support frame is nowhere near the angle of the back forks of my racer. So the clamp wouldn’t grasp the frame properly and would also be likely to damage the frame – by focusing pressure on too small an area at the top of the forks.

Secondly, the clamping arrangment at the top of the support frame is too low to the ground for my racer. It would need to be considerably higher to take my racer while also keeping the back wheel off the ground.

Thirdly, even if the clamping system suited, the angles involved (plus the extra inch in diameter of the racer’s wheels) would leave the racer’s cogs closer to the alternator. So the chain connecting the two would have to be shortened by a link or four to ensure it remained reasonably taut and functional. The trailing edge of the back wheel was also going to end up v. close to the leading edge of the stator. Not good. Not good at all, at all 🙁

My initial thoughts are that a modified-trainging-stand-arrangmement is the answer.

One which supports the bike via cup-shaped-clamps at the level of the back wheel axle. But it will also need to allow the bike be slid forward and away from the turbine before clamping (so as to ensure the connecting chain is kept reasonably taut). Time and experimentation will tell. But that arragenment appeals initially. Because not only will it allow quick release of my bike to get out the road but should also allow other bikes be hooked up.

In case I ever get a new bike with bigger wheels.

Or friends want to charge their own batteries on bikes that suit their body size.

Assuming my friends are as mad as I am of course! 😀

Anyhow, time for the pen and paper. Then some grinding and welding as I DIY a bike training stand.


Video of the turbike!

Sorry!  Forgot to post the video of The Turbike. In time I’ll start putting up some guidelines re how to make it, design considerations etc. But the basics of what’s needed are:

  1. a frame to hold the bike steady
  2. a frame to hold the turbine alternator steady (the forces are quite strong on it)
  3. a turbine alternator (mine is the 3m one from Hugh’s Recipe Book)
  4. all the bits & bobs needed for getting the electricity to (and from) the battery
  5. a bike you won’t be in a hurry to disengage and take out on the road!

Here’s how The Turbike looks and works so far:

I’ll do some posts about the reality of pedaling and regenerating my office’s power as soon as I get more experience of that.